Showing posts with label bead inspiration. Show all posts

Wednesday, January 16, 2013

2013 Here I come!

I spent last week working hard getting all my accounts ready and sorting out all of my tax.  I was quite surprised at the amount of glass I have accumulated over the last year and all the different colours I had stashed away.  Whilst I was doing a stock check I also decided to give my studio a good clean.  I don't think I have seen the surface of my desk for quite some time and now it is a shiny sparkling wonder of cleanliness. 
 
 
All of my tangled and untidy stringers (thinner bits of glass used for decorating the suface of beads) are all put away in any container I can find .... looking very messy but not on my nice clean desk.
 
 
I have an old plant pot full of sand from Exmouth Beach (I think) holding all my mandrels in place ... ready for action ....
 
 
Now I thought having a good clean and tidy would also bring lots of inspiration but it seems to have had the reverse effect!  Help!  I am starting 2013 with no ideas, an empty mind, a thoroughly clean studio .... have I cleaned too much?  Have I cleaned away all my inspiration? 
 
 
I always go back to my photos of Barcelona for inspiration .... but even they aren't  helping me this morning!  What to do when these moments occur?  Write a blog post about having a nice clean studio and a mind empty of all inspiration, hoping that something will occur as these words are being written.
 
I am waiting for a Eureka moment to occur within the synapses of my brain!  Apparently the human brain is estimated to have between 100 - 500 trillion synapses .... so something should be happening deep within my cerebral cortex very soon! ....... I hope ......
 
 
Sarah xx
 

Monday, October 22, 2012

October Beads Give Away!

I was about to list these beads on Etsy and decided NO! I am going to give these beads away instead.  I haven't had a bead givaway yet and it is about time that I had one!  These are a fun and interesting set of beads.  The set consists of 7 lentil shaped beads with raised blue dots.  They could be used to make a fantastic piece of jewellery.


Now, it is not going to be that easy mind you!  You will have to answer a very simple question .... 

Give me the name of the blog post these beads were originally featured in?  All you have to do is e-mail the answer to slbunney@gmail.com with the title Bead Givaway! 


The winner will be randomly selected on Friday 26th October and announced on this blog post!

Good Luck

Sarah xx

Friday 26th October: The Winner is ..... Chrissie Baker!
Congratulations Chrissie!

www.beadscrumptious.co.uk
http://www.hypersmash.com

Wednesday, October 17, 2012

Nautical - Gaudi Inspired!


After dropping off my little kiddy winks this morning I went straight up to shed/studio/shed, turned on my kiln and pondered what colour combinations to use today.  I wanted fresh, bright and vibrant.  After probably 30 mins searching through my stash of glass (and going off to feed my chickens) I came up with this combination.   

I think I am still having a 'Gaudi' moment because the trapped bubbles within the glass remind me so much of the Casa Batllo in Barcelona.  I know I keep going on and on about Gaudi but I can't help it, the man was a genius!  Anyway, Gaudi designed the Casa Battlo on a nautical theme and there is plenty of evidence for this as you walk around the house.  But he also considered so many other aspects in his designs.  For instance, the colour of the tiles in the stairwell get pregressively darker as you ascend the stairs.  This was to give a more natural balance of light (there was more natural light further up the stairs) as you ascend/descend the stairs.  I digress ...... sorry ... can't help myself.....


As you can see from my photograph above Gaudi had inserted glass panels as part of the bannisters.  Now interestingly, when you looked through these you get the illusion of being underwater .....


The distortion produced by placing a glass bubble if you like, on top of a bead design reminds me of these bannisters.  Perhaps my mind works in a peculiar way or I am just completely obsessed with Gaudi ... who knows?  But this set of beads, especially the colours, the distorting bubbles of glass and the trapped air dots that remind me of bulbous fish eyes, all take me back to a nautical theme.

I shall leave you with a few more pictures of my new set of beads to let you ponder what they remind you of!


This set of beads is available to buy on Etsy - Beadscrumptious on Etsy


Sarah xx
www.beadscrumptious.co.uk
HyperSmash.com

Tuesday, October 16, 2012

Woman in Black!


I had this set of beads on Etsy for a few months.  The inspiration came from reading the Woman in Black!  A very scary but brilliant book!  If you have the chance I would definitely recommend reading it, especially when you are tucked up warm and cosy on a winter night with the rain lashing against the windows and the wind howling around outside ...... 

My beads did suddenly take a dark turn  ..... The set comprised 7 lentil shaped beads using a dark grey transparent glass with a strip of silvered Ivory just resting on the top of the bead.  This was slightly raised and gave the beads an organic look. 

I should mention briefly what I mean by silvered Ivory stringer.  I take an Ivory glass rod and heat it in the flame until it becomes molten then I roll the molten glass in silver leaf.  I place this back into the flame at a lower temperature and using my pliers to grip the warm end of the glass rod I then pull the glass into a very thin rod/strip.  This cools and forms what is called 'a stringer' which is basically a very thin rod of glass!

Every time I looked at my shop on Etsy - Beadscrumptious on Etsy (just in case you wondered where my shop was ......) I had this niggle in the back of my mind as to whether I should remove them from my listings and make a piece of jewellery from them.  Well, the other day whilst pondering what to make for Christmas I came across this set of beads and could not resist them any longer. 


I wanted to keep the bracelet simple but elegant!  Each lentil shaped bead was enclosed within sterling silver saucer beads.  Between each group of beads I added a 6mm swarovski crystal to add a touch of sparkle.

The next day I went back out to my studio and made some more of these beads so that I can make a necklace and some earrings to match.  When I have a complete set I will be listing them all in my new shop on WOW Thank You!

What Christmas creations are you making? 

Hypersmash.com

Friday, October 5, 2012

Catching Up!


Before I start any ramblings .... Hello to my new readers from HelloCotton and Bead Magazine!

I don't know what has happened to me over the last couple of weeks.  I have more time yet I feel as though I am constantly behind and need to catch up with myself!  I think my brain is working faster than the rest of me and I can't keep up with all the ideas whizzing through my head .... for instance the photograph above shows the beads I made last week .... where are this weeks beads?  They are still waiting to be cleaned .... arghhhhh!  I just cannot get motivated!  What is wrong with me?  ..... please don't answer that ....I'm not sure I want to know! ....

So anyway ... enough waffle .... last Monday I gave myself the glass challenge to make bright and beautiful beads ....  Ok so here they are ....

Whilst they are bright, rather than make me think about my lost summer (awful British weather) they remind me of the interior of Gaudi's Casa Batllo in BarcelonaI think it is the colours of the glass and the big blue circles in the beads that make me think of great big distorted fish eyes!  I am so inspired by this man that I could write many blog posts about his work.  Just take a look a look at the window below!  It looks so fluid and yet it is made from stone.  Now, with some jiggery I know I could re-create this effect in glass and on a bead.  Unfortunately (some of you may be able to relate to this) I can do only this if I am in the right mind set!  It can be very frustrating when you have a million ideas in your head but you can't re-create them.


Antoni Gaudi designed the most amazing house based on a nautical theme and ever since my trip to Barcelona I have been inspired to make beads that capture the designs within the house.  So many times I have tried to make them and have failed.  

I am very behind on my 52 earrings in a year challenge.  I am so behind I am starting to feel ashamed of myself.  The whole idea was to develop my skills in polymer clay and then everything stopped!  But this week I have made two pairs of earrings and hopefully by the end of today I will have made a few more.  I have cheated ..... yes ....yes .... one pair of earrings is made from glass........ 


Finally, I am in the middle of writing a tutorial to show future beaders (or anyone who reads this blog?) how to make a necklace using one of my Enchanted Tree Beads.  I have had some lovely comments about them, thank you.  The inter-galactic tree bead is still in development.  I made a really good one and was so pleased with myself until I took it out of the kiln and found a great big crack down the middle.  It is soul destroying when you have spent so much time and effort making a bead and you find it has cracked, probably before it even went in the kiln.


My challenge for next Monday is going to carry on with the nautical theme and try to make a bead with a trapped jellyfish inside.  Not sure how I will get on but I do like to be challenged...  The Protea explosion/implosion bead is still in development and I have a new one to show you next time.

Ok, I am now going to grab some Marmite on toast (my latest obsession) and will get back to work!

Have a good week!

Sarah xx 
www.hypersmash.com

Wednesday, July 18, 2012

A Completed Necklace!


I love you to Pluto .... and back!

I wrote about the inspiration behind this pendant in my blog post I love you to Pluto .... and back!.  I also wrote that I would show you how I turned this pendant into a necklace.  So ...... here goes!

1  Gather all your materials and tools.


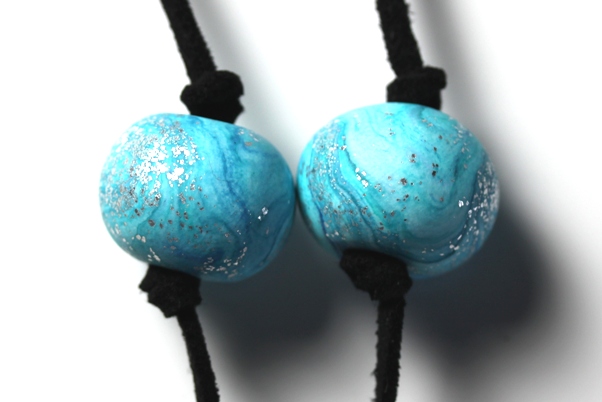
I wanted the pendant to be the focus of the necklace so I chose materials that would compliment the colours within the pendant.  I used a thick black suede as the stringing material and included some handmade blue beads to enhance the colours of Pluto.  Now, my intention was that the blue beads would represent planets in the solar system of my necklace.  To achieve this I made these beads using polymer clay mixed with acrylic paints, silver leaf and lots of swirling .... but I will leave this for another blog!

2  Stringing the pendant.


When I made the pendant I turned one of the craters into a stringing hole.  I had a fairly good idea how I was going to make the necklace before I started so I made sure the hole was fairly large. 

This pendant would look good as either a long or short necklace but I like mine long so I cut 19 inches of suede and strung it (equally) through the crater/hole.  I know, you are thinking ..... mmmmm that is a VERY long necklace but I needed to ensure I had enough stringing material for knotting.  It will all become very clear as you continue reading ......

I needed to give the pendant some stability before I strung on any beads so I tied a knot in the suede at the top of the pendant.

3  Stringing Beads!


I placed a knot in each thread at slightly different heights and threaded a bead onto each one.   I had two smaller beads and thought these would look really good as two orbiting moons! I didn't want them crashing into one another which is why I slightly offset them.  I placed a knot above each bead to keep them secure.  I don't want them whizzing off into outer space .....


I placed a knot in the same place on each thread because I wanted the next set of beads to be in exactly the same place on the necklace.  I threaded the beads and added another knot to keep them in place.  They look like this ....


I didn't want to stop here .... I added another set of beads on top and finished them with a knot so they looked like this .......


ooops .... after the photograph ..... I added the knots on top of the beads to stop them moving around on the thread.

I placed the next two knots (one on each thread) at an equal distance from the set above and added one bead on each thread.

4  Finishing the necklace.

I cut each thread so that they were exactly the same length.  I then took my cord ends (centre of the photograph) and placed one on each thread. 


Then, very gently (using my pliers) I squeezed the cord ends together to meet in the middle and trap the thread ..... see photos ......


5  Adding open jump rings!

When I first started making my own jewellery I had a lot of trouble with these tricky little blighters until I read all about them in a magazine.  My biggest mistake was to try and pull them apart to attach onto things like cord ends and I couldn't get them back together again without distorting the ring and leaving a huge gap.  Well, I now know there is an easy way ..... all you need to do to open them is grip each side of the jump ring either side of the opening and slide one side forward and one side back ....easy when you know how! To close, all you need to do is the reverse and they slide together without leaving a gap!

I attached a large junp ring onto one cord end and a smaller jump ring onto the other.  No, I haven't lost my marbles .... there is a method to my madness! 


I attached the trigger clasp to the smaller jump ring and used the larger jump ring to attach to .... like this ....


6  A finished Necklace!  ...... Hooray!


When I am at craft fairs a lot of people like my beads but don't really know what they can make with them or how to go about making jewellery so I hope I have given you a few ideas.  My future blog posts will have some more ideas on what you can make using my glass beads. 


I have also been asked what you could make using my Enchanted Tree Beads.  I am thinking about writing a tutorial to share a few of my own ideas.  Maybe my next blog post?

Sarah xx
Hypersmash.com

Monday, June 25, 2012

Floral Beads - The Development of the Stamen!

I am always striving to improve my beads and to find a new challenge!  I can't help myself my brain is always working ahead of me on the next bead or next project and for a long time I have had this niggle in the back of my mind .... "why not add stamens to my floral beads?" 

Whilst they look pretty and almost like trapped flowers with the plunged dot in the centre, they would look much more realistic with stamens!  So, my brain goes off into over drive .... how can this be achieved ...... and I find myself turning into an amature botanist examining and photographing every flower I see .....


The stamen is composed of two parts; the big orange (in this case) furry bit at the top called the anther, which is responsible for producing pollen and the long slender stalk called the filament, at the base of which can be found nectar.  The stamen is the male reproductive part of the flower and the large protuberance in the middle is the female reproductive part of the flower called the carpel (pistil).  This consists of the stigma which is at the tip, then the style and the ovary at the base.  Ok .... biology lesson over ..... so how do I incorporate this into a bead?


This was the tricky part .... I decided to start off simple and made a very simple cane using opaque yellow glass encased in clear.  I made these into stringers and aligned them horizontally on a clear rod.  I encased the cane in clear again and pulled this into a stringer.  The development of the anther would have to be a project for for another day!

I decided to keep the flowers simple too (little white petals) and concentrate only on the stamens.  Now, I know this photograph isn't brilliant but I found it difficult to see the stamens, they were too small and spindly(maybe the cane was too thin).  Annoyingly, I kept trapping bubbles of air between the outer encasing layer and the stamen which also made them difficult to see.  So, I go back and study a few more flowers for some ideas ....


I made a more complex cane based on the Choisya flower in the photo above.  I decided to attempt multi-layering the cane by alternating a layer of orange with yellow and white encased canes.  If I hadn't of been so heavy handed with the white cane then I think this may have been more sucessful!  


This bead was a total disaster!  I thought I would try and be clever and make a Geranium bead.  Quite a few things went wrong here.  The number of petals was my first big mistake!  They don't look too bad in this photo, but throughout the bead I had stray petals that didn't look as though they belonged to anything.  I made these stamens using a simple cane - brown glass encased in clear, pulled into fairly thick stringers and then placed horizontally on a clear glass rod.  I added multiple layers of brown cane separated each time with a layer of clear.  Again they looked a little spindly to me!

There must be a way to make the stamens stand out more? ...... Perhaps if I add a white dot to the centre of the flower and add the stamen cane on top of that ...... no!  I think I made an even bigger disaster with this bead .... still this is a good way to learn .... I suppose .... and practice makes perfect!  haa haa!  Sometimes, quite by accident you can stumble across a new idea .... if I develop the centre of the bead further (forget adding petals) I will have the start of a Lily. 


This was my final attempt at stamens!  I went back to the simple yellow glass cane, used larger stringers and multi-layered this onto a clear glass rod encasing each layer in clear glass.  Finally I pulled all of this into a fairly thick stringer and used it to create my stamens.  I am happy with these for now!  I just have to perfect my technique so that all my flowers are consistent.

Well ..... there is still this niggle about the anther's .... oh and having the same number of stamens as petals!


Sarah xx

Hypersmash.com