Showing posts with label polymer clay beads. Show all posts

Wednesday, May 29, 2013

Polymer Clay Challenge : May 2013


I have been playing it quite safe with these polymer challenges so far mainly because I haven't had the time to make anything too extravagant.  That doesn't mean the ideas aren't there.  Believe me I have loads of beads/ideas I want to make but unfortunately I just don't have the time.  I do record everything in my sketchbook so the ideas don't get forgotton. 
 
I have made beads like these before and I liked the colour combinations so much that I wanted to have another go at making them.  Now, whilst making these beads I realised that not only do I need to record my ideas for designs I also need to record exactly how I make them.  You are probably thinking, "Isn't that what your sketchbook is for?" .... well, yes and no.  I initially draw the designs, colour combinations and inspiration for the beads but usually when taking a piece of work from a sketch book into reality you change a few things here and there.  It is those little changes that I don't record.  I also become easily sidetracked into making other things along the way ..... I don't record those either ..... grrrrrr 


I need to make more time to make flower canes as well.  I really enjoy making them, it is quite therapeutic you know! I want to develop the shape of the petals a bit more and add some depth to the flowers.  Lots to work on .... just need the time ......


I used the beads to make a very long necklace and matching bracelet.  I combined the polymer clay beads with my handmade lampwork glass beads and separated these with heamatite seed beads. These were all connected to a black chain, combined with a string of blue sparkly seed beads and blue silken thread.  
 
I am using all my polymer clay beads to make an affordable jewellery range for when I attend craft fairs and jewellery parties.  I am really enjoying making them all too because I can sit and make jewellery with my family whilst they are watching a film.  I do lose a few beads here and there when my children decide they want to have a go making an item of jewellery .... but what can you do?

Sarah xx
www.beadscrumptious.co.uk
www.hypersmash.com  


Thursday, May 2, 2013

Polymer Clay Challenge - April 2013

 
This month I decided to submit these beads for my polymer clay challenge.  I am always making round beads and decided that I would have a change.  I didn't realise how difficult it would be trying to get them all the same size.  I thought I would be clever and use the same amount of clay for each bead which was sensible and works for round beads.  The problem came when I tried to shape them.  On reflection I could have made my life a lot easier if I had of used a bead press but sometimes when you are overcome by creativity you don't have time to order and then wait for the postman to deliver essential items.  Still, I have learnt a lesson for next time!


So, what did I create with these beads?  Perhaps I should have written that before the photograph .... oh well!  Yes, I made a necklace.  I have been making lots of necklaces lately using my polymer clay and lampwork beads.  I used plain turquoise lampwork beads because the polymer clay beads were so brightly coloured and vibrant I needed a contrast.  I choose turquoise as an accent colour to pick up the swirls of turquoise within the polymer beads.  I separated my beads using bright pink and I mean bright PINK seed beads.  I am having my very own seed bead revolution at the moment and I have been using them for everything!  However, they are incredibly fiddly, half of them end up on the floor or up the hoover so I am not sure how long this obsession will last.


I found these metallic flowers at a bead fair and they make brilliant connector/focal beads.  I like to hang a cluster of dangles from the bottom of the necklace for a bit of interest and just because I like it when they all jingle together.


The beads were very simple to make but the effect is very striking.  I am definitely going to make some more of these for myself in lots of different colours.....but using a bead press.....

Sarah xx
www.beadscrumptious.co.uk
www.hypersmash.com

Wednesday, March 6, 2013

Polymer Clay Challenge : February!


This year I decided to start a new polymer clay challenge as I failed so miserably to keep up with the 52 Earrings in a Year Challenge! So I am taking part in Elvira Kricks - 12 Polymer Projects in a Year.

Last month I made some black and white flowers.  I am eventually going to use them to make some jewellery but all of a sudden everything has gone manic and there just aren't enough hours in the day.  I cannot keep up with all my ideas/current work ..... everything .... which I might add is very frustrating!  I have lists of lists .... arghhhhhh!


Anyway, enough of that .... this month I decided to work my way through my box of un-finished polymer clay beads and finally get around to completing at least one piece of work.


I found these beads in the box.  They needed to be sanded and polished and I thought that this could kind of qualify for the challenge?  They weren't finished after all? 
 
So where did the inspiration for these beads come from?  Well, I wrote a tutorial last year called - Marvel Inspired Beads.  My son had left one of his comics lying around and this inspired me to make a set of beads using black, white and red polymer clay.  I liked the effect and wondered what the beads would like using different colours.  Sometimes, even though you are using the same tutorial you can end up with a very different result just by making a few alterations ... for instance colour!  In this instance the effect is very similar but has definitely sparked a few alterations for next time ......
 
Sarah xx
 

Wednesday, February 20, 2013

I need more time ....


I didn't have time for a Monday Glass Challenge this week which is a shame because I didn't get any studio time to melt some glass.  The pages in my sketch book are bursting full of ideas and new techniques I want to try and old ones I want to develop further. But, I am not complaining because I do have a very busy couple of weeks.


I have also been looking through all my un-finished polymer clay work and have vowed not to make any more until I have finished everything!  It is quite daunting because during the Summer months I had a polymer frenzy and there is so much to catch up with.  I am hoping to squeeze this in between my work over the next couple of weeks and will hopefully have some pretty finished clay pieces to show you.  I thought I would share a selection of the beads that need to be finished!
 
I  made these beads as part of the 52 earrings in a year challenge.  I like creating this shape and thought rather than make them in one colour I would see what they looked like with a pattern.  I was going to cluster these and turn them into a pendant or a large flower on a bracelet.  I haven't decided yet!

These pendants are part of my experiments with Stroppel Cane.  They need sanding and polishing and if I make some black round beads could make a very striking necklace.....


Cara Jane showed me how to make these hearts and ever since she showed me I haven't stopped making them.  Whilst I have made quite a few of these, they still all need to be sanded and polished.  They will eventually be turned into pretty peices of jewellery .... sometime .... when I get around to finishing them ....


Finally (this is only a selection of the beads I have to finish) I thought I would show you my pink swirly tabs.  I want to create a lovely summery bracelet with these.  Although I do regret no having made a few more so I could make a necklace and earrings to match. 


Do you have an un-finished work?  Does it help to re-ignite any lost creativity?  Sometimes when I have one of those moments I do take a look through my beads and sometimes it creates a spark and them off I go on the rollorcoaster ride of ideas.
 
Sarah xx
www.beadscrumptious.co.uk
www.hypersmash.com

Friday, October 5, 2012

Catching Up!


Before I start any ramblings .... Hello to my new readers from HelloCotton and Bead Magazine!

I don't know what has happened to me over the last couple of weeks.  I have more time yet I feel as though I am constantly behind and need to catch up with myself!  I think my brain is working faster than the rest of me and I can't keep up with all the ideas whizzing through my head .... for instance the photograph above shows the beads I made last week .... where are this weeks beads?  They are still waiting to be cleaned .... arghhhhh!  I just cannot get motivated!  What is wrong with me?  ..... please don't answer that ....I'm not sure I want to know! ....

So anyway ... enough waffle .... last Monday I gave myself the glass challenge to make bright and beautiful beads ....  Ok so here they are ....

Whilst they are bright, rather than make me think about my lost summer (awful British weather) they remind me of the interior of Gaudi's Casa Batllo in BarcelonaI think it is the colours of the glass and the big blue circles in the beads that make me think of great big distorted fish eyes!  I am so inspired by this man that I could write many blog posts about his work.  Just take a look a look at the window below!  It looks so fluid and yet it is made from stone.  Now, with some jiggery I know I could re-create this effect in glass and on a bead.  Unfortunately (some of you may be able to relate to this) I can do only this if I am in the right mind set!  It can be very frustrating when you have a million ideas in your head but you can't re-create them.


Antoni Gaudi designed the most amazing house based on a nautical theme and ever since my trip to Barcelona I have been inspired to make beads that capture the designs within the house.  So many times I have tried to make them and have failed.  

I am very behind on my 52 earrings in a year challenge.  I am so behind I am starting to feel ashamed of myself.  The whole idea was to develop my skills in polymer clay and then everything stopped!  But this week I have made two pairs of earrings and hopefully by the end of today I will have made a few more.  I have cheated ..... yes ....yes .... one pair of earrings is made from glass........ 


Finally, I am in the middle of writing a tutorial to show future beaders (or anyone who reads this blog?) how to make a necklace using one of my Enchanted Tree Beads.  I have had some lovely comments about them, thank you.  The inter-galactic tree bead is still in development.  I made a really good one and was so pleased with myself until I took it out of the kiln and found a great big crack down the middle.  It is soul destroying when you have spent so much time and effort making a bead and you find it has cracked, probably before it even went in the kiln.


My challenge for next Monday is going to carry on with the nautical theme and try to make a bead with a trapped jellyfish inside.  Not sure how I will get on but I do like to be challenged...  The Protea explosion/implosion bead is still in development and I have a new one to show you next time.

Ok, I am now going to grab some Marmite on toast (my latest obsession) and will get back to work!

Have a good week!

Sarah xx 
www.hypersmash.com

Wednesday, July 25, 2012

Hectic Week!


It was completely manic last week with all the end of term activities for the kids but I still managed to squeeze in my earrings for Week 14.  I completely confused myself over what week it was too.  For some reason I had two entries for Week 8 ...... I am going bonkers!

I made the beads for these earrings quite a long time ago and had completely forgotton about them until the other day when I found them lurking at the bottom of my bead box.  I can remember why they ended up there.  To be honest, I wasn't sure what to make with them and if I really liked them.

This has happened quite a few times.  I have had an idea for a set of beads and made them but they haven't quite turned out as I had imagined.  Now, this doesn't mean that they aren't very nice beads but when I am in the 'creative zone' they end up being put to one side whilst I concentrate on getting the design exactly the same as the image in my head.

I always keep these bead sets because I know from experience that in a few months/weeks time, I will look at the beads and see them completely differently.  Or they will become the spark of inspiration for a piece of jewellery.

Sarah xx
HyperSmash

Wednesday, July 18, 2012

A Completed Necklace!


I love you to Pluto .... and back!

I wrote about the inspiration behind this pendant in my blog post I love you to Pluto .... and back!.  I also wrote that I would show you how I turned this pendant into a necklace.  So ...... here goes!

1  Gather all your materials and tools.


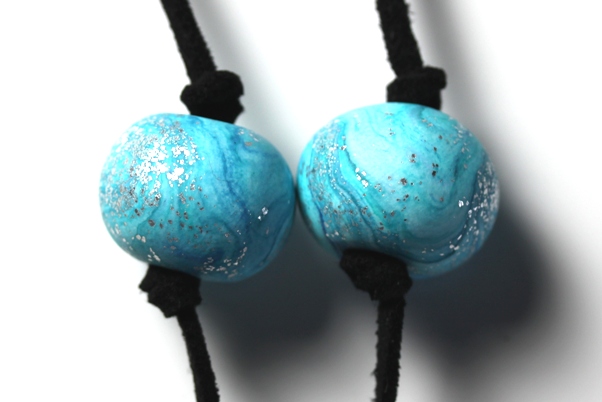
I wanted the pendant to be the focus of the necklace so I chose materials that would compliment the colours within the pendant.  I used a thick black suede as the stringing material and included some handmade blue beads to enhance the colours of Pluto.  Now, my intention was that the blue beads would represent planets in the solar system of my necklace.  To achieve this I made these beads using polymer clay mixed with acrylic paints, silver leaf and lots of swirling .... but I will leave this for another blog!

2  Stringing the pendant.


When I made the pendant I turned one of the craters into a stringing hole.  I had a fairly good idea how I was going to make the necklace before I started so I made sure the hole was fairly large. 

This pendant would look good as either a long or short necklace but I like mine long so I cut 19 inches of suede and strung it (equally) through the crater/hole.  I know, you are thinking ..... mmmmm that is a VERY long necklace but I needed to ensure I had enough stringing material for knotting.  It will all become very clear as you continue reading ......

I needed to give the pendant some stability before I strung on any beads so I tied a knot in the suede at the top of the pendant.

3  Stringing Beads!


I placed a knot in each thread at slightly different heights and threaded a bead onto each one.   I had two smaller beads and thought these would look really good as two orbiting moons! I didn't want them crashing into one another which is why I slightly offset them.  I placed a knot above each bead to keep them secure.  I don't want them whizzing off into outer space .....


I placed a knot in the same place on each thread because I wanted the next set of beads to be in exactly the same place on the necklace.  I threaded the beads and added another knot to keep them in place.  They look like this ....


I didn't want to stop here .... I added another set of beads on top and finished them with a knot so they looked like this .......


ooops .... after the photograph ..... I added the knots on top of the beads to stop them moving around on the thread.

I placed the next two knots (one on each thread) at an equal distance from the set above and added one bead on each thread.

4  Finishing the necklace.

I cut each thread so that they were exactly the same length.  I then took my cord ends (centre of the photograph) and placed one on each thread. 


Then, very gently (using my pliers) I squeezed the cord ends together to meet in the middle and trap the thread ..... see photos ......


5  Adding open jump rings!

When I first started making my own jewellery I had a lot of trouble with these tricky little blighters until I read all about them in a magazine.  My biggest mistake was to try and pull them apart to attach onto things like cord ends and I couldn't get them back together again without distorting the ring and leaving a huge gap.  Well, I now know there is an easy way ..... all you need to do to open them is grip each side of the jump ring either side of the opening and slide one side forward and one side back ....easy when you know how! To close, all you need to do is the reverse and they slide together without leaving a gap!

I attached a large junp ring onto one cord end and a smaller jump ring onto the other.  No, I haven't lost my marbles .... there is a method to my madness! 


I attached the trigger clasp to the smaller jump ring and used the larger jump ring to attach to .... like this ....


6  A finished Necklace!  ...... Hooray!


When I am at craft fairs a lot of people like my beads but don't really know what they can make with them or how to go about making jewellery so I hope I have given you a few ideas.  My future blog posts will have some more ideas on what you can make using my glass beads. 


I have also been asked what you could make using my Enchanted Tree Beads.  I am thinking about writing a tutorial to share a few of my own ideas.  Maybe my next blog post?

Sarah xx
Hypersmash.com
Hypersmash.com